Have you heard of automated modeling in Autodesk Fusion but don’t how to apply it? Read on for three ideas.
Automated modeling is a tool for automating the process of exploring and creating design concepts in Autodesk Fusion. Using simple definitions of what to connect and what to avoid, it uses generative design technology to create multiple design possibilities in a matter of minutes. Designs created in this way become a new body or component in your design that can be further edited as required, or simply used as inspiration for your own design ideas.
Since releasing this tool, we’ve seen it used in powerful ways, from accelerating the design process to creating new concepts to augmenting and enhancing traditional design workflows.
Let’s explore how you can leverage automated modeling. Hopefully, these three ideas will inspire you to give the tool a try if you haven’t already.
1. Use automated modeling for design automation
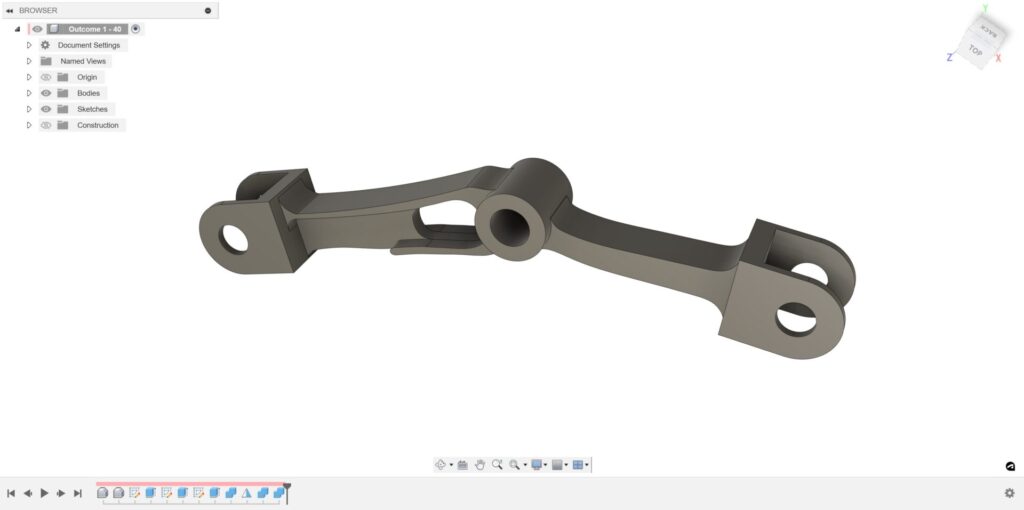
The first and most obvious way to use automated modeling is as an extremely fast automated design tool. To use automated modeling, simply select the faces you want to connect and the tool will use patented algorithms from generative design to automatically create a new component that connects the desired faces.
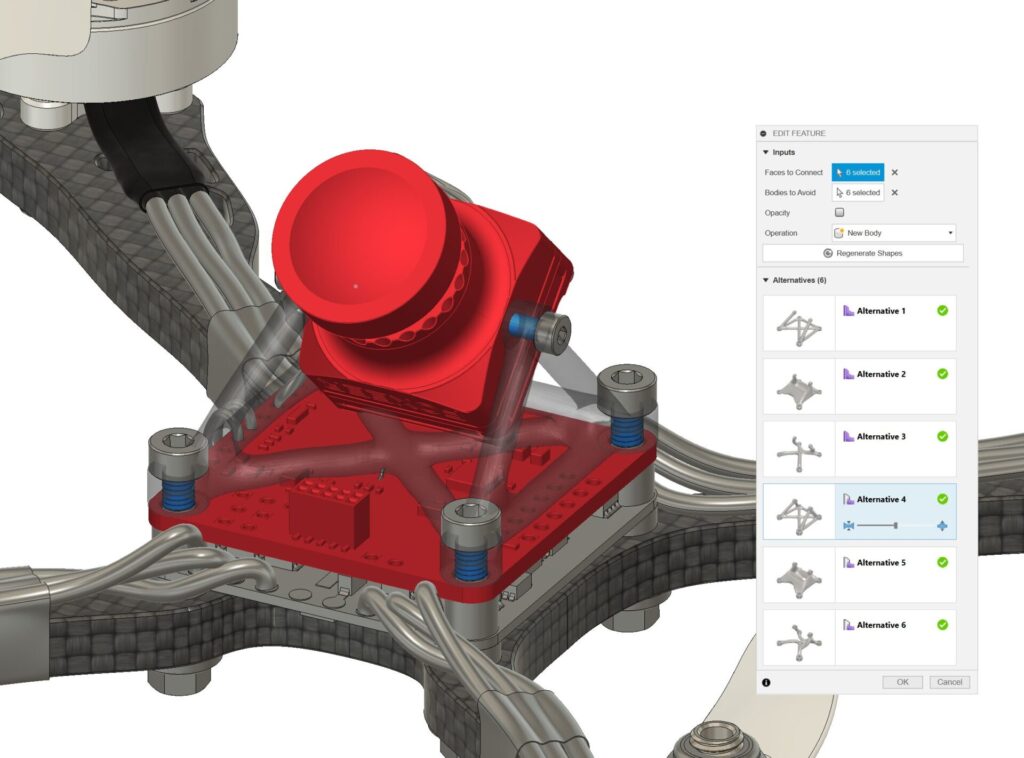
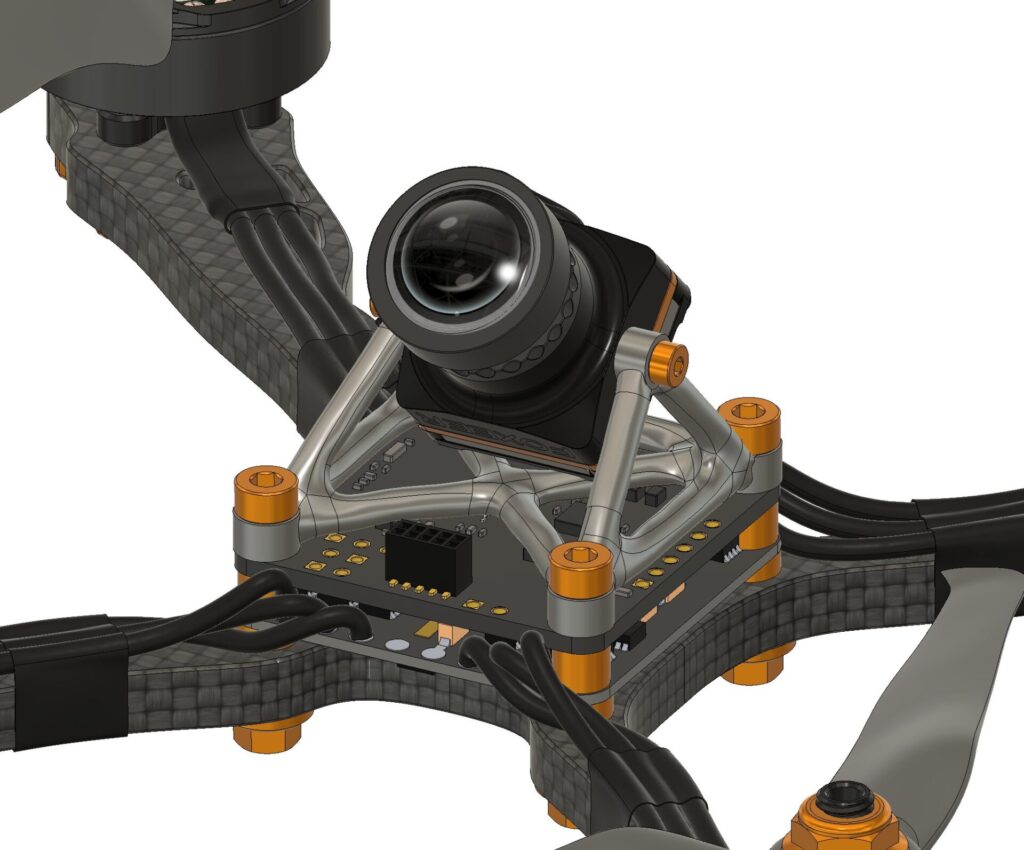
For example, say you want to create a relatively simple structure to 3D print, such as the camera mount for the drone shown in the images above and below. Simply select the different pieces you want to connect, and automated modeling will automatically create three to six realistic design possibilities in less time than it would take to model one. You can then click between the different designs to preview them or even adjust the thickness with a simple slider to fine-tune each one.
Once you’re happy with the results, press OK. Your new design will be created, either as a new body or a new component, inside your Fusion design file. This body acts just as if you had modeled it from scratch. It’s fully possible to edit, manipulate, or use in downstream workflows such as simulation, manufacturing, or generative design.
2. Leverage it alongside generative design
Automated modeling uses generative design technology, but there are significant differences in how and when to use it. These differences can make the two technologies extremely complimentary.
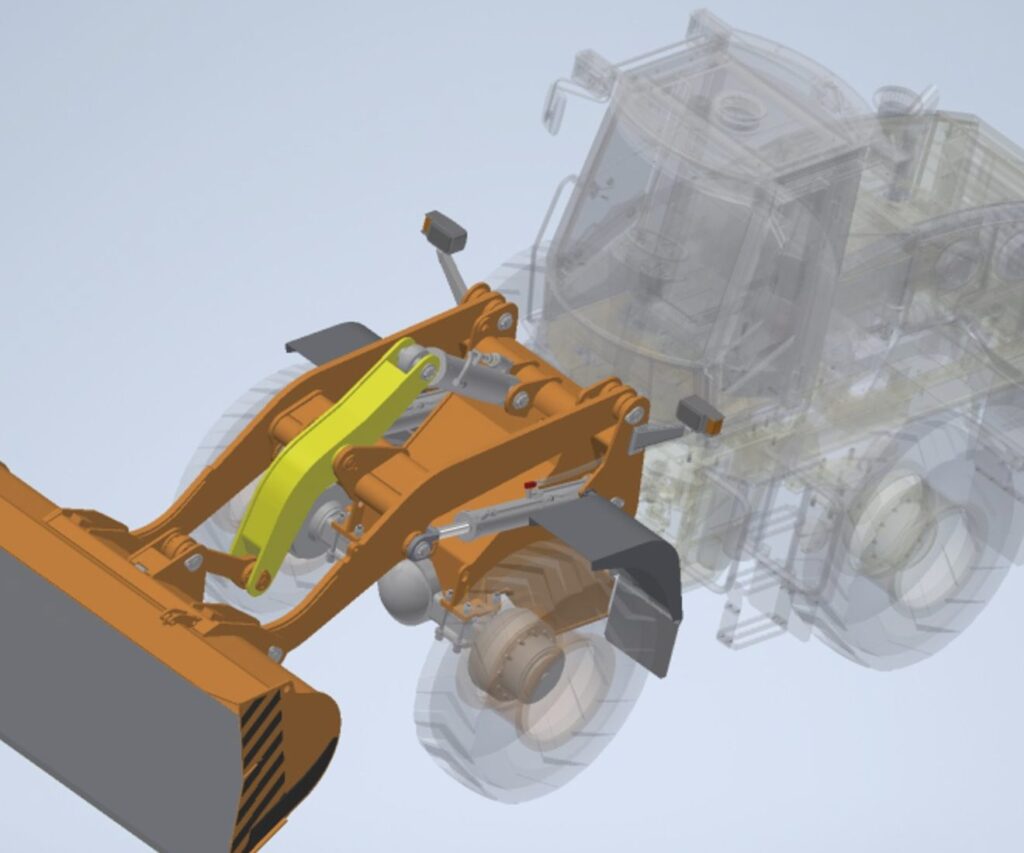
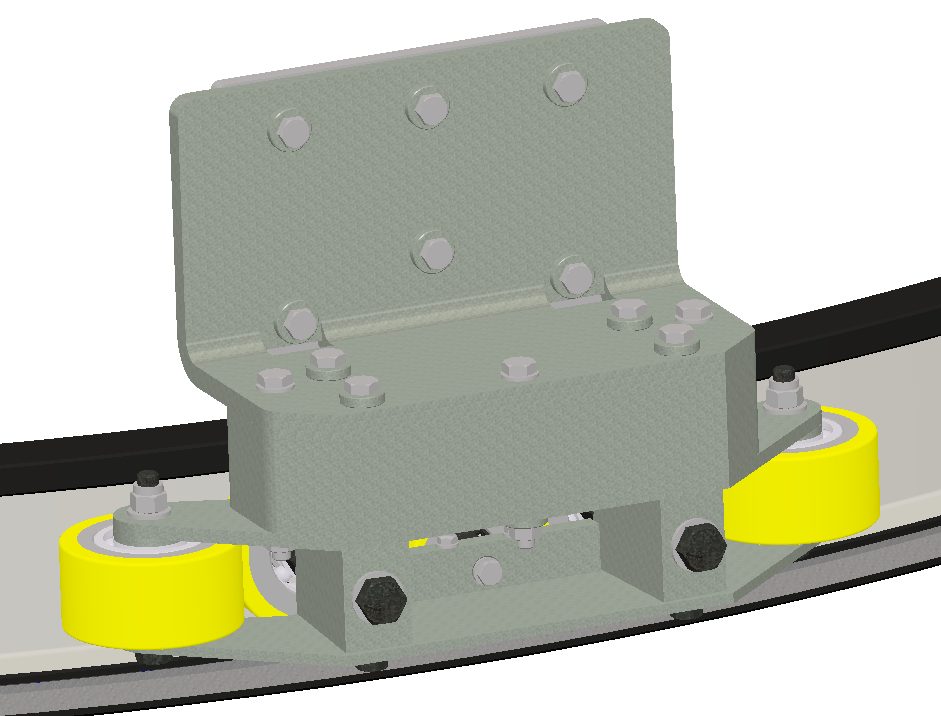
In this next example, we’re working on a front-loader model. We need to create a design for the structural part marked in yellow which controls the tilt of the bucket.
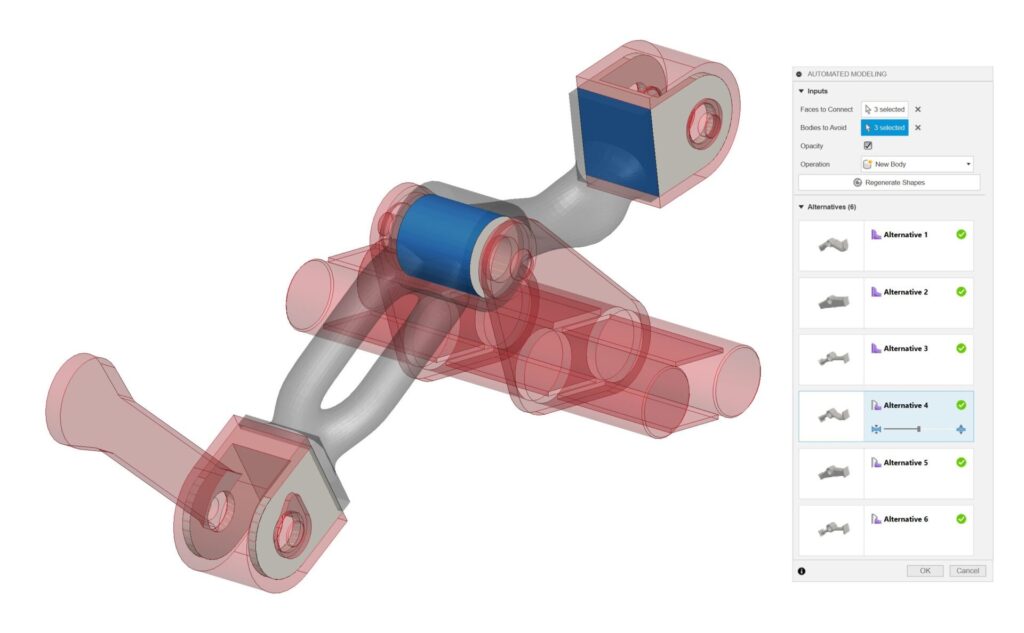
Automated modeling can help create design concepts very quickly, but with no concept of structural requirements, it is unlikely that it will automatically create our final design. During the beginning of the design process, automated modeling can help create a quick placeholder part to temporarily occupy space that a fully designed part will occupy later on.
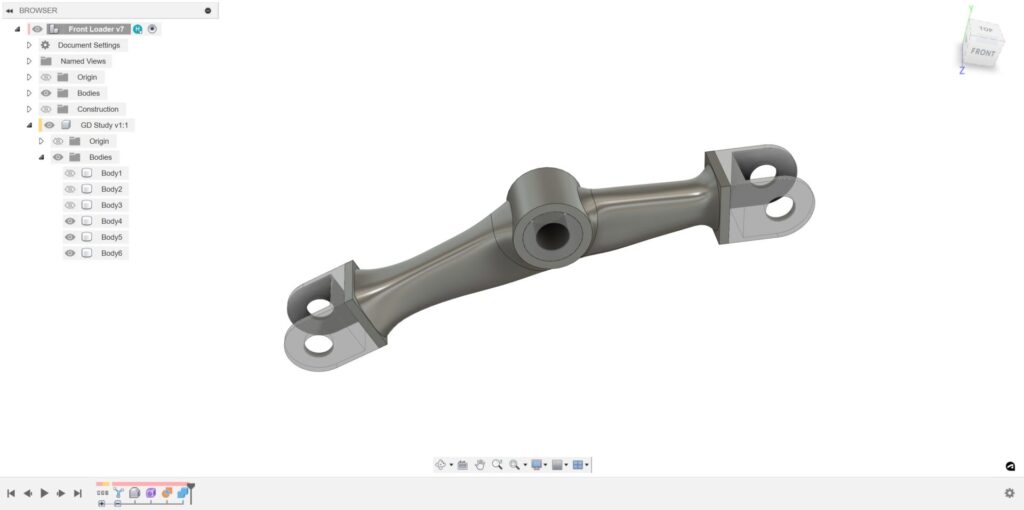
We can then model our final part manually or using generative design. Generative design is well suited to solving problems like this where our component needs to be lightweight and has clear structural requirements. By quickly creating many iterations, generative design learns where it can add or remove material to create structurally optimized shapes.
By starting in automated modeling, we’ve already figured out our bodies to avoid and connection geometry, as well as our key concepts in generative design. So some of the work to set up a generative design study has already been completed.
Generative design then lets us add additional definitions to our setup, such as structural loading requirements and manufacturing process design. This means that generative design takes a lot longer to set up and solve—think a few hours rather than a few minutes. However, our final design will have much more intelligence built into it.
Automated modeling is so quick and easy to use, so it makes sense to include it as a step in your generative design workflow, even in cases like this where it is unlikely to form your final design. It helps get the early parts of the generative design process set up correctly, gives you quick feedback about what your designs may look like, and can serve as placeholder geometry while you work to complete your final design.
3. Try it for concept generation
We can also use automated modeling purely as a concept generation tool. Sometimes it can help to have a visualization of what a design may look like physically, rather than having to work from imagination alone. In the same way, automated modeling can be helpful to get some early ideas down on paper, just as we might sketch something ourselves. Only this time, the software is aiding the ideation process.

A great example of this process would be to quickly explore how we might consolidate parts on an assembly. Part consolidation is a powerful way to reduce component costs. However, by reducing the number of constituent parts, we can reduce the number of manufacturing steps and assembly required. Reducing the cost required for tooling, reducing the complexity, and reducing the time taken to assemble the part.
Automated modeling can be a powerful way to visualize part consolidation ideas. By selecting the things we want to connect together, the algorithm can quickly explore ways that our design might connect with a single body, rather than with multiple connected components. This visualization can spark ideas that may inspire us to make something completely new.
As discussed in this article, you can use automated modeling in Autodesk Fusion in many different ways. To automate a design process completely, to work alongside other modeling tools like generative design, or for pure ideation and concept development. Since we released automated modeling, we’ve seen it used in hundreds of creative ways to solve problems and create new ideas. In general, there is no one right way to use automated modeling. More than anything else, we encourage you to experiment with this powerful tool.