In this article, we’ll do a deep dive on how 5-axis machining works in Fusion 360 — from 5-axis use cases to selecting a strategy.
If you haven’t seen Fusion 360 in the last 6 months, prepare to be impressed. Fusion 360 recently underwent a major 5-axis programming upgrade. In this two-part series, we take a deep dive into how 5-axis programming works in Fusion 360.
First, let’s roll up our sleeves and get into when to use 5-axis machining versus 3+2 axis machining and the different strategies you can choose from in Fusion 360.
How is 5-axis programming in Fusion 360 different?
The answer here is “powerful simplicity.” In our view, 5-axis programming should be as easy as 3-axis machining. Sure, those additional two axes add a layer of complexity, but that shouldn’t mean programming them is like trying to solve a Rubik’s Cube with your eyes shut (yep, I’m old enough to remember).
The Fusion 360 team has focused on providing tools and automated workflows to make 5-axis programming simple. But simplicity alone isn’t enough without the power and flexibility to create the machining files you need. And it’s here where Fusion 360 packs a surprising punch by offering advanced tool axis controls to help machine your parts how you want to.
When should I use 5-axis machining?
Let’s start with a reality check. Simultaneous 5-axis machining is great, but it isn’t always the best solution for every machining job. There – I said it.
Whether you’ve bolted a second-hand rotary table onto a 3-axis machine or bought a million-dollar 5-axis mill-turn machine, our advice would be to use simultaneous 5-axis milling only when it’s needed and when 3+2 machining isn’t up to the task. The reason? Well, it’s all down to machine construction, the machine’s kinematic accuracy, and whether it has software to compensate for any mechanical errors.
Here’s a general rule of thumb: Any time you move all five axes of the machine at the same time, you increase the likelihood of imperfections appearing on the machined surface. Why? Well, all machines have a degree of mechanical inaccuracy (yes, even that million-dollar model). When the machine is moving, any mechanical errors, axis backlash, axis misalignment, or poor thermal stability, can all impact your machine’s ability to accurately position the cutting tool in your workpiece.
Simultaneous 5-axis movement can cause subtle variations in cutting tool forces, which can lead to witness lines, dig-ins, or other blemishes in the part. Removing these defects relies on additional processes, such as polishing, that take time, cost money, and aren’t always well controlled.
So, even if you’ve bought a shiny new 5-axis machine with all the bells and whistles, consider 3+2 machining first. It’s a great choice for accessing undercuts and hard-to-reach features, enabling the use of shorter tools, and machining parts with fewer setups. Fusion 360 base users get access to the majority of 3+2 programming tools, including accessibility shading, interactive tool axis alignment, and so much more.
How to Select a 5-axis strategy
So, you’ve determined that 5-axis machining is the right method for your project. The first step to 5-axis machining is choosing a strategy that will machine a part that fits your specific needs. As you might expect, Fusion 360 has a library of different strategies to choose from – the vast majority of which support 5-axis machining.
Here are some example scenarios with a suggested Fusion 360 3D finishing strategy:
Scenario 1
You’re machining a part containing multiple nested features and dread spending hours creating dozens of separate toolpaths.
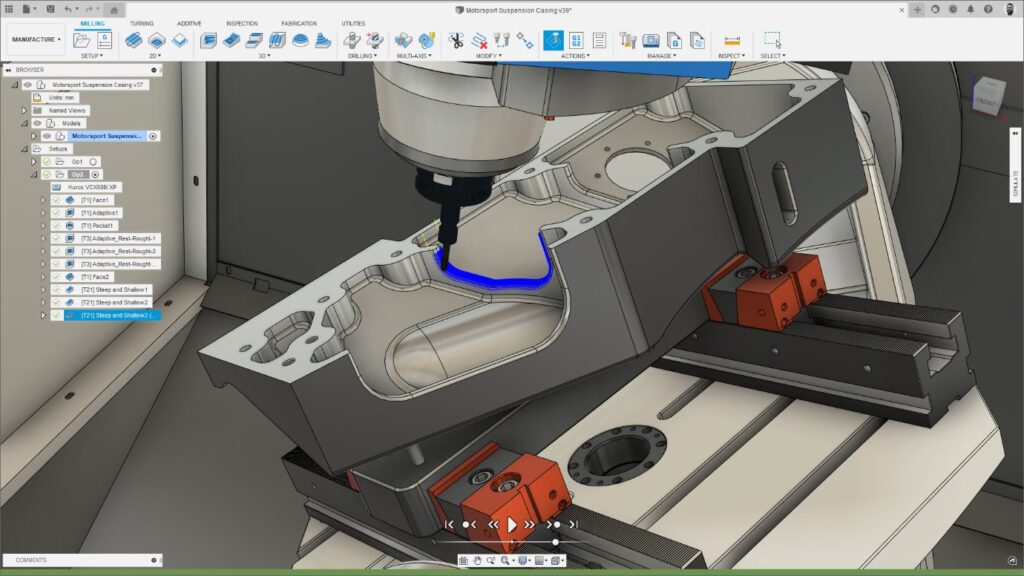
Solution: Choose “Steep and Shallow,” as this can safely and efficiently machine these kinds of complex part with a single toolpath with cool options such as separate controls for the steep and shallow regions, automatic overlap, wall clearance, and cusp-removal.
Scenario 2
You’re machining individual features on a part and need to achieve optimum surface finish.
Solution: Choose “Morph”, “Flow”, or “Blend” as these produce toolpaths with shapes that are derived from the feature being machined – resulting in constant surface stepover and exceptional surface finish.
Scenario 3
You’re machining parts that contain pockets/upstands with straight sided pockets.
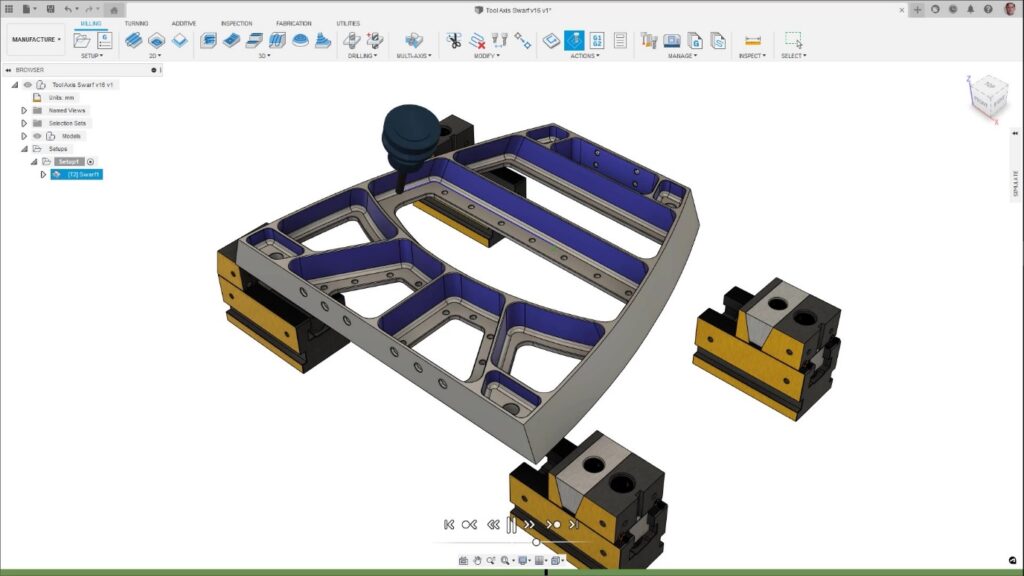
Solution: “Choose Swarf” as this uses the side of the cutting tool to machine the entire sidewall of the pocket in a single pass — a much faster option than scanning across the part with a ball nose tool and a small 3D stepover.
Flexibility is the key here. Fusion 360 offers a range of strategies, ensuring that you’ll never hit a brick wall where there’s nothing that works for you.
Assess your tool axis options
Okay, so we’ve picked the appropriate strategy to machine your part. We now need to consider the different methods of defining and controlling the 5-axis motion. Fusion 360 offers a range of Primary Tool Axis modes:
- Vertical – 3-axis machining. Note this option can also be used with automatic collision avoidance (more on this later).
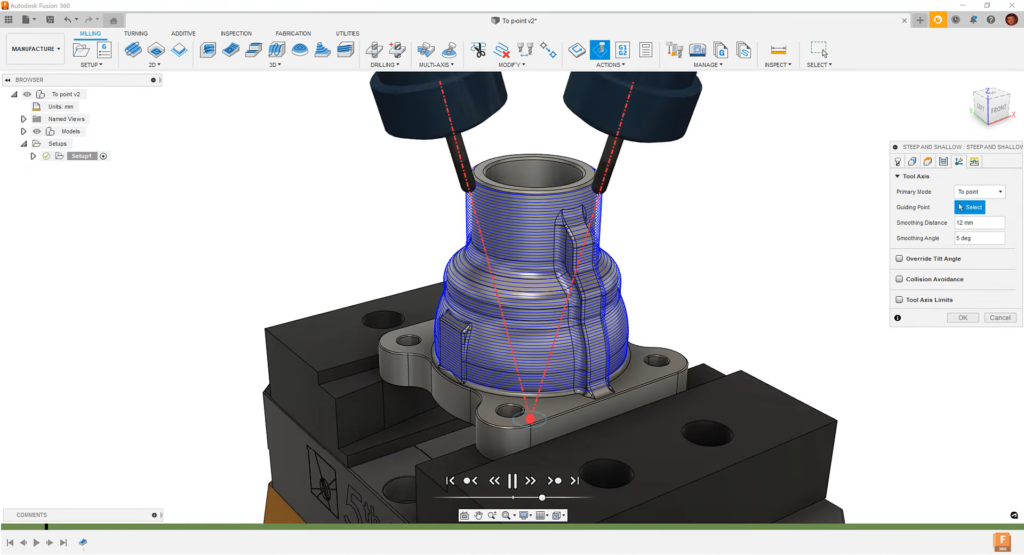
- To a user-defined point/curve – the tool axis is adjusted such that the tip of the tool is pointing towards the point/curve. The is ideal for machining protruding shapes/features.
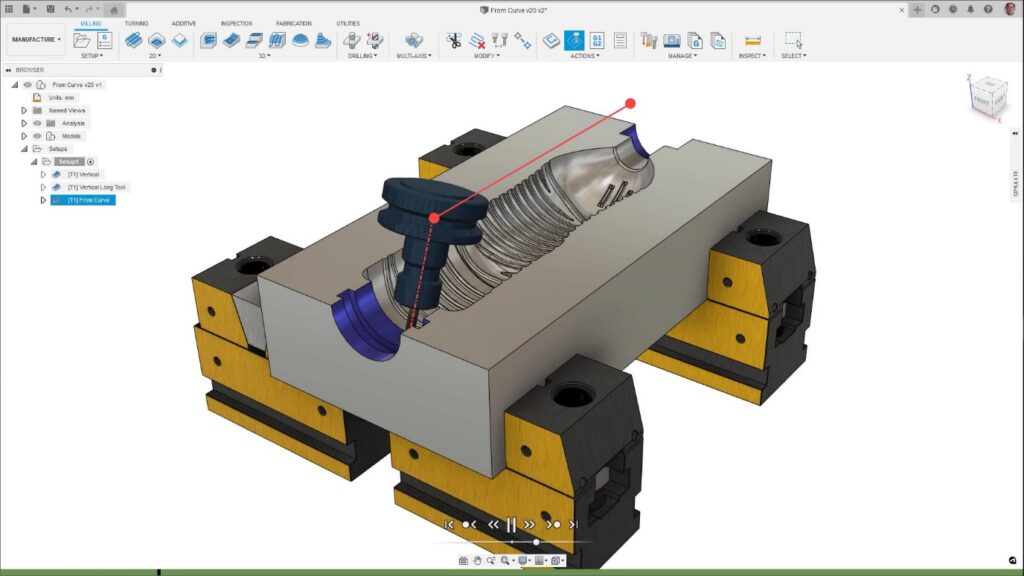
- From a user-defined point/curve – the tool axis is adjusted such that the tip of the tool is pointing away from the curve/point. This is ideal for machining recessed pockets/features.
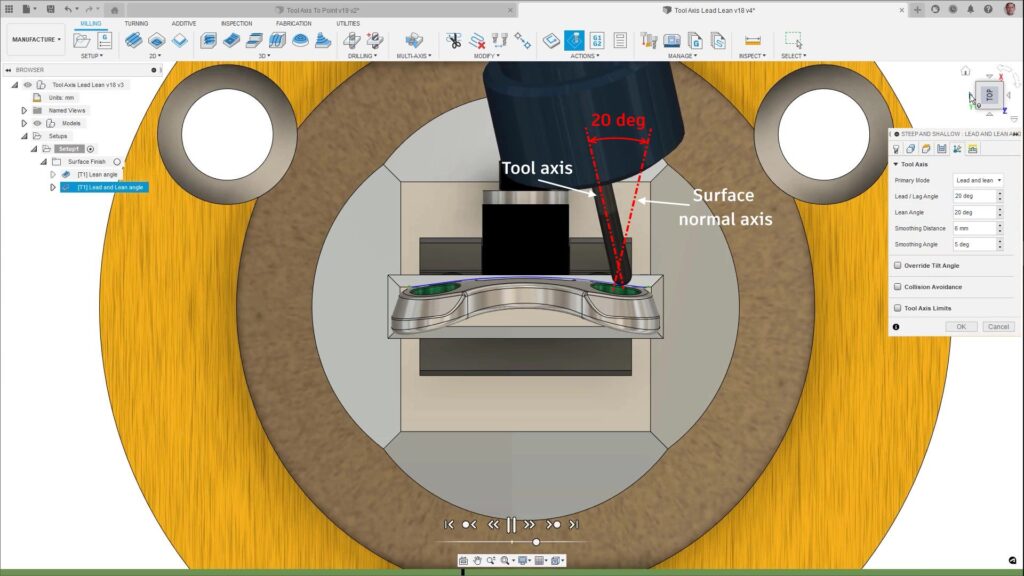
- Lead/lean – tilts the tool using angles that are relative to the underlying model. Here, “lead” tilts the tool in the direction of travel (i.e. tilting forwards or backward), whereas “lean” represents a sideways tilt in relation to the direction of travel (i.e. leaning to the left or right). A lead and lean value of 0 degrees will align the tool axis so that it is perpendicular to the underlying surface(s).
Besides roughing toolpaths (which are usually best carried out with 3+2 machining), most 3D finishing strategies in Fusion 360 support some form of 5-axis machine motion.
Strategies such as Parallel, Scallop, Spiral, Pencil, Morphed Spiral, Project, Morph, Radial, and Steep and Shallow ALL now support a primary tool axis of “to” or “from” a user-defined point or curve. This is a powerful option in cases where a point/curve can be positioned either above or below the model to guide the tool axis such that the tip of the tool is pointing in the desired direction relative to the model.
The example below shows the use of “to point” to machine a protruding shape. Here, the tip of the tool is pointing towards a point positioned below the part.
This second example shows the machining of a bottle mold using “From Curve.” Here, the curve is a simple line positioned above the part, causing the tip of the tool to point away from the curve and toward the model being machined.
Flow, Blend, Multi-axis Contour, and Steep and Shallow support a tool axis of “Lead and Lean.” Here, the tool is tilted to a fixed (user-defined) angle relative to the underlying surface being machined. This enables some interesting programming choices:
Lead and lean can be used in conjunction with tip radiused cutters to machine large, gently curving surfaces (such as car body panels). Here, the defined angle can position the leading edge of the tool on the part and allow larger stepovers to be used that can achieve high levels of surface finish with short cycle times. Alternatively, lead and lean can be used with ball-nosed tools to tilt them to avoid engaging the non-cutting tip of the tool onto the model.
Whichever approach you’re using, it’s safe to say lead and lean can have a big impact on part quality, tool utilization, and machining cycle times.
Finally, the specialist strategy Swarf uses a different tool axis whereby the side of the tool is aligned against the side walls of pockets (only when the sidewalls are “ruled-surfaces” that can be machined in this way). This is a particularly effective way to machine features, such as pockets or bosses, even those containing sidewalls that are non-vertical or contain undercuts, as these strategies tend to use larger axial depths of cut and small radial stepovers.
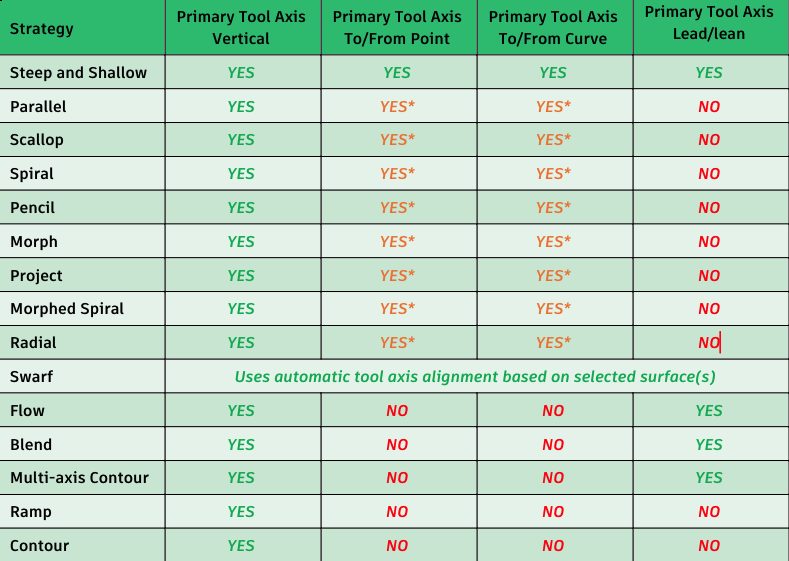
With more than a dozen 3D finishing strategies to choose from, and a range of tool axis options to combine them with, it’s probably worth summarizing these into a handy chart.
There are still some 3D finishing strategies that don’t yet support 5-axis machining. Rest assured the development team is working hard to address these in future releases.
See Fusion 360 5-axis tools in action
Watch the below tutorial to see the new 5-axis options in action. Here, we walk you through the various tool axis options and explain how they can be combined to achieve different solutions.
Ready to try 5-axis machining with Fusion 360? In addition to accessing 30-day free trial of Fusion 360, you can also start a 7-day free trial of the Fusion 360 Machining Extension. Try the Fusion 360 Machining Extension for free today:
